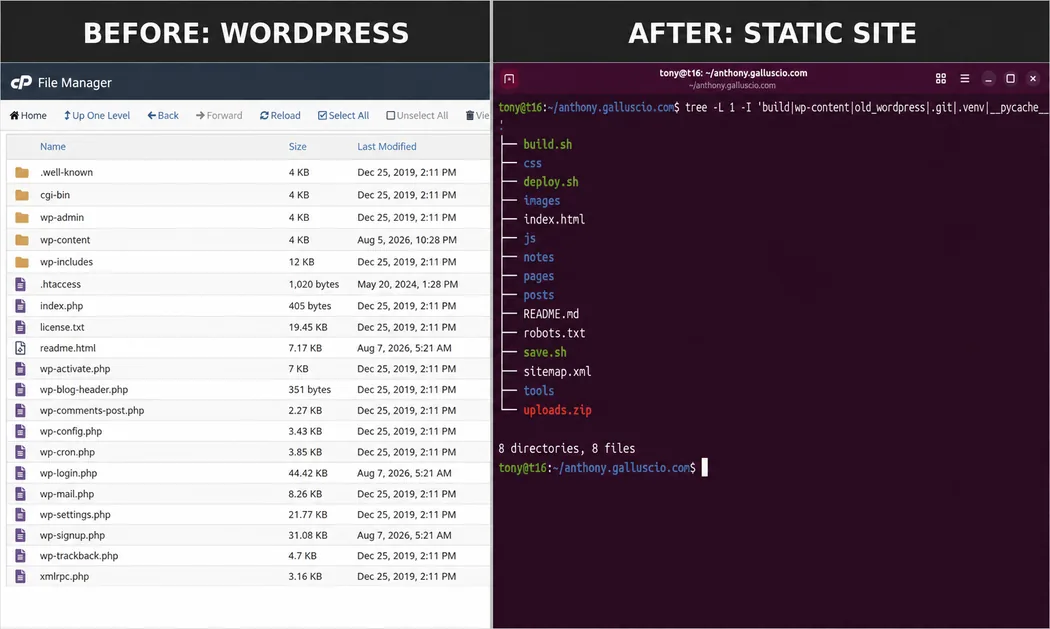
After a four-and-a-half-year absence, I decided to start writing on my personal blog again. I dusted off the WordPress site I had been using and quickly discovered that getting back to writing meant first getting back into the business of maintaining WordPress.
That wasn't what I wanted to do.
Two days later, WordPress was gone.
How I Got Here
There was nothing fundamentally wrong with my old website. In fact, one of my requirements for its replacement was that the new site look almost exactly like it.
The problem was everything behind it.
I hadn't actively maintained the site while I wasn't blogging. WordPress itself and many of its plugins needed attention. Some things no longer worked correctly. The domain and hosting had also ended up being managed in different places over the years, which added another layer I didn't need.
More importantly, the site had become considerably more complicated than the job it was doing.
This is a personal blog. I write posts. I have a few static pages. I display photographs and occasionally other media. I want people to be able to browse posts by category and date. I want the site to work well on a phone and load quickly.
WordPress can certainly do all of those things. But as I started thinking about features I wanted to add, the answer repeatedly seemed to be another plugin, another component, or another layer to maintain.
I found myself asking a very basic engineering question:
What does this site actually need?
Starting With the Requirements
Once I stopped thinking in terms of "replacing WordPress" and started thinking about the requirements of the website, the problem became much simpler.
I needed to preserve every existing post and page. I wanted the existing URLs to continue working so old links and search engine results wouldn't break. I needed to preserve the photographs and other media from the old site. I wanted the appearance to remain familiar.
I also wanted responsive images, responsive tables, pagination, monthly archives, a posting calendar, categories, a sticky sidebar on larger screens, and a responsive mobile layout.
What I did not need was a database, an administrative application running on the server, PHP generating pages on every request, or a collection of plugins.
For this particular site, I couldn't identify a good reason for JavaScript to be involved in displaying the blog at all. The one exception is the contact page, where a small amount of JavaScript is useful.
So we didn't use it anywhere else.
Building the Replacement
I worked on the migration with my personal AI assistant, which I call Navigator.
I think that distinction is worth mentioning because there is a right way and a wrong way to use AI for this kind of work.
I didn't tell an AI to "build me a website" and then blindly deploy whatever it produced. Navigator and I worked through the existing site, its content, its behavior, and its requirements incrementally. We made a change, built the site, checked the result, and then moved to the next thing.
One of our working rules became particularly important: no regression.
Once something worked, we treated it as something that needed to be preserved. Before changing a core file, we worked from the current version of that file rather than reconstructing it from memory or generating a replacement based on what we thought it contained.
AI was extremely useful in this process, but I remained responsible for the architecture, the decisions, the testing, and ultimately what went into production.
To me, that is responsible use of AI. It is a very capable engineering partner, not a substitute for engineering judgment.
What Replaced WordPress?
The replacement is remarkably small.
Posts are ordinary, human-readable files. Each has a small metadata section containing things such as its title, date, URL slug, category, SEO information, and featured image. The body of the post is HTML.
Pages work essentially the same way.
A Python build program reads those source files and generates the complete static website. It builds the homepage, individual posts and pages, pagination, monthly archives, category pages, the posting calendar, sidebar, and other shared pieces of the site.
CSS handles the presentation and responsive behavior.
Historical WordPress media remains at its old /wp-content/uploads/ paths so existing URLs continue to work. New media goes into a simple /images/ directory. That lets me preserve compatibility with the old site without continuing to organize new content as though WordPress were still there.
The result that gets deployed is just a static website.
No WordPress.
No database.
No PHP application.
And essentially no client-side JavaScript.
I Didn't Want Simplicity to Mean Sloppy
One thing I did not want was to trade the controls of a content management system for a directory full of files that I could accidentally overwrite or lose.
The entire source site is therefore kept in Git.
That gives me straightforward version control over the posts, pages, CSS, build software, and other source files. If I make a mistake, I have history. If I want to know what changed, I can see exactly what changed.
I also built the workflow around three simple commands: build, save, and deploy.
Building creates the complete site from the source files.
Saving records the current work in Git.
Deploying publishes the generated site to the web server.
There is an additional safety rule that I particularly like: the deployment process refuses to deploy a dirty repository.
If I have changed something and haven't committed it, deployment stops.
That means the website in production should always correspond to a known version in Git. I can't casually make a change, forget to save it, and push an unrecorded state into production.
It's a very small control, but it gives me something I value much more than another layer of software: confidence that I know exactly what I deployed.
The Migration
The migration took two days.
We exported the WordPress content and media, converted the posts and pages into the new source format, reproduced the existing site design, and then worked through the details.
We preserved the existing URLs. We restored and audited the media. We added image optimization. We made images and tables responsive. We tested different browser sizes and mobile layouts. We added pagination, categories, monthly archives, the posting calendar, a sticky sidebar, and a copyright footer.
The old WordPress installation is still preserved on the server for now, but it is no longer serving the website.
The interesting part is that most visitors probably wouldn't immediately realize anything changed.
That was intentional.
I wasn't trying to redesign my blog. I was trying to modernize how it works.
The Result
The new site looks like my old site.
It is also considerably faster, easier for me to understand, easier for me to modify, and has capabilities the old site didn't have.
Most importantly, there is very little running that needs to be maintained.
That's the part of this project I find most interesting.
In technology, we often treat modernization as an additive process. We modernize something by adding a framework, a service, an abstraction layer, a platform, or another piece of software.
Sometimes those things are exactly what a system needs.
But sometimes the better engineering decision is to look at what the system is actually required to do and start removing things.
My personal blog did not need a better-maintained WordPress installation.
It didn't need more plugins.
It didn't need a new framework.
It needed HTML, CSS, a small build system, Git, and a web server.
Sometimes modernization means removing technology.
One of the things I wanted to fix on our 2026 Tiffin Allegro Open Road 29NA was the rear camera.
The OEM camera was unreliable. Both the dealership and the Tiffin service center tried to fix it, but neither was able to make it reliable. Even when it worked, I wasn't particularly happy with the image quality or the position of the camera.
There was another problem that was just as important to me. The OEM camera shared a display with the navigation system, entertainment system, and the other cameras on the coach. When we're flat towing our Jeep, I want to be able to look up at any time and see the Jeep and the traffic behind it. I wanted the equivalent of a rearview mirror, not another selectable camera on a shared display.
My solution was to install a Furrion Vision S as a completely independent observation camera system with its own dedicated monitor.
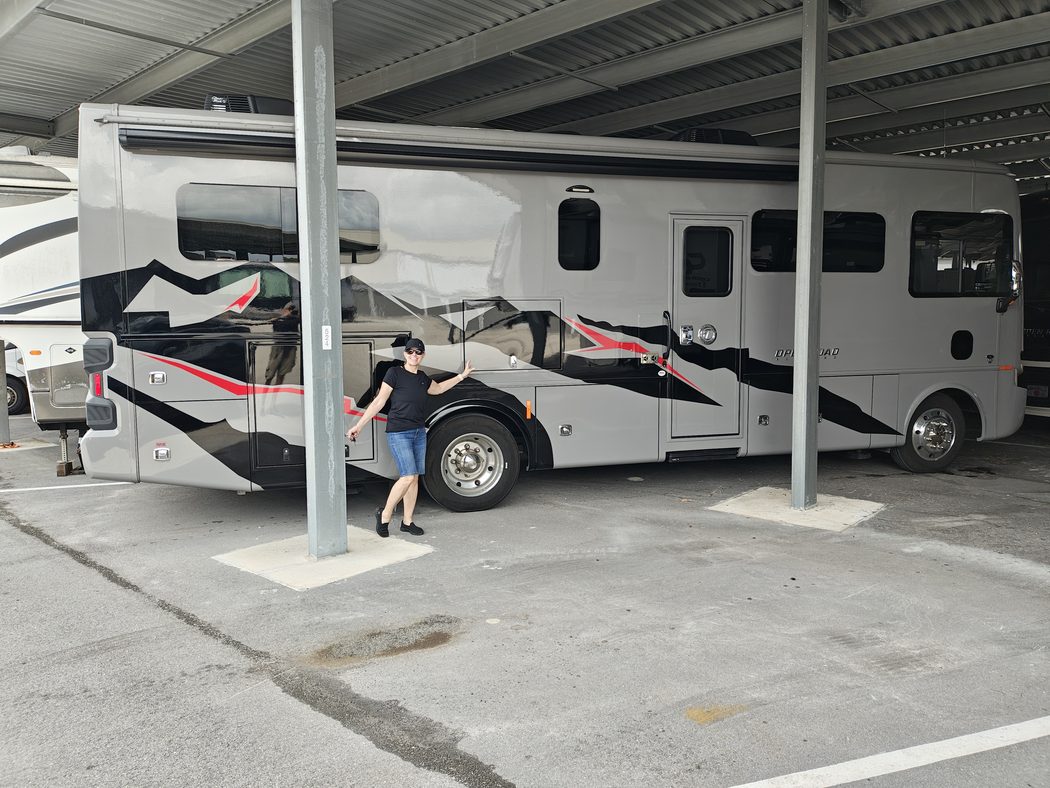
This is our motor home.
Challenge
I initially spent time trying to get the OEM camera working correctly and also investigated whether I could reuse its wiring for the Furrion.
In retrospect, I wouldn't do either again.
The OEM wiring was potentially part of the original problem, and it didn't provide the simple, direct power source I needed for the Furrion. Rather than continuing to troubleshoot a system I already didn't trust, I decided to bypass it.
I did, however, reuse the existing hole from the OEM camera. That gave me a good location for the Furrion without drilling another camera hole into the rear of the coach.
Directly above the camera is the center upper marker light.
That turned out to be the key to the installation.
Rear of the coach showing the camera location and center marker light directly above it.
Solution
Getting Power to the Camera
I removed the center marker light and determined that I could use its running-light circuit to power the Furrion.
To get the new power wire from the marker-light opening down to the camera opening, I used a stiff piece of non-electrical wire and fashioned a hook on the end. I used that to snag and pull the new wire between the two openings.
It was simple and saved me from having to open anything else up.
The center marker light removed while I worked with the running-light circuit.
I made the electrical connections using heat-shrink crimp connectors to help protect them from moisture.
There is one consequence of powering the camera this way: the coach's running lights have to be on for the Furrion camera to operate.
I'm perfectly happy with that. When I'm driving and want the observation camera, I simply have the running lights on. But it's important to know if you're considering doing the same thing.
At this point, I thought I was basically finished.
I wasn't.
The 11.4-Volt Problem
The camera worked perfectly while the coach was sitting with the engine off.
Then I started the engine.
The camera shut itself off.
That was an interesting problem because nothing had changed with the camera itself. It worked with the engine off and stopped working with the engine running.
So I got out the multimeter.
I measured the voltage on the circuit with the engine off and then measured it again with the engine running. With the engine running, the voltage at the camera dropped to approximately 11.4 volts.
That was low enough that the Furrion would shut itself down.
Testing the marker-light circuit with a multimeter helped isolate the voltage problem.
That testing was important because it isolated the problem. I wasn't dealing with another bad camera, a wireless connection problem, or something mysterious in the Furrion system. The camera simply wasn't getting sufficient voltage under the conditions in which I actually needed to use it.
Now I needed a way to provide the camera with a stable 12-volt supply.
Adding the DROK Regulator
My first thought was to find something small enough to fit inside the camera housing. That would have made for the cleanest installation.
I couldn't find a suitable solution that was small enough.
Instead, I found a DROK weatherproof DC voltage regulator that accepts a 9–36V input and provides a regulated 12V output.
Because it is a small weatherproof black box, I could mount it externally. I installed it immediately below the Furrion camera.
The weatherproof DROK DC/DC regulator I used to provide a stable 12-volt supply.The Furrion camera and DROK regulator assembled before installation.The finished camera installation on the rear of the coach.
The power arrangement was now straightforward: power comes from the center marker/running-light circuit, passes through the DROK regulator, and then supplies the Furrion camera with regulated 12V power.
I tested the system again under the condition that had caused the original failure: with the engine running.
This time the camera stayed on.
That solved the problem.
Mounting the Monitor
I wanted the monitor in a position that felt natural while driving. I didn't want it sitting on the dashboard or attached to the windshield.
Our 29NA has the cabinet above and between the pilot and copilot where Tiffin offers an optional front television. I had removed that TV, which gave me a convenient way to route the wiring for the Furrion monitor.
For the mount itself, I reused the tabletop/dash mount that came with the Furrion monitor.
I drilled mounting holes in the Furrion stand, flipped it upside down, and bolted it directly to the underside of the empty TV cabinet. I used stainless-steel bolts, washers, and locknuts.
The result puts the monitor almost exactly where a rearview mirror would naturally be in a car.
For the power cable, I drilled a 1/2-inch hole through the underside of the cabinet.
I happened to have a bag of assorted rubber grommets in my garage, and one fit the hole perfectly. I installed the grommet so the power cable passes through rubber instead of rubbing against the raw edge of the drilled hole.
The cable runs through the cabinet to a plug in the upper-left cabinet.
An advantage of doing it this way is that I can simply unplug the monitor if I ever want to remove it.
The finished monitor installation beneath the front TV cabinet.
Outcome
The result has been better than I expected.
The image is extremely clear, and the camera gives me exactly the view I wanted. I can see the entire Jeep while we're towing it, as well as vehicles approaching from behind.
The position of the monitor is also nearly perfect. Looking at it feels natural—very much like glancing at the rearview mirror in a car.
Ready to roll. The monitor sits naturally in my line of sight much like a rearview mirror.
Most importantly, the system has proven itself on the road.
We've driven approximately 3,000 miles with this installation, including some particularly rough roads in South Carolina. The wireless connection has been 100% stable. I've had no problems with the camera, the monitor mount, or the DROK installation.
There is one characteristic of the Furrion image that took some getting used to: objects are considerably closer than they appear on the monitor.
After driving with it for a while, I've adjusted to that. I don't use the monitor to judge precise following distances anyway. Its primary purpose is situational awareness: I can see the Jeep, see what's happening around it, and see vehicles approaching from behind.
For that purpose, it works extremely well.
What I'd Do Differently
There are a few things I'd change if I did the project again.
First, I wouldn't spend time trying to fix the OEM camera. The dealership and Tiffin had already tried, and I ultimately replaced it anyway.
I also wouldn't spend time investigating whether I could reuse the OEM camera wiring. Building an independent system with its own power source turned out to be the better solution.
Second, I'd be a little more careful during the wiring. I forgot to heat-shrink one of my connections before reinstalling the marker light, which meant I had to take the marker light off a second time to finish the job properly. That was entirely avoidable.
Finally, I used silicone to seal around the camera and marker light. It has worked, but I think there are probably better sealing products for this application. If I were doing the installation again, I'd investigate the alternatives before automatically reaching for silicone.
Other than those things, I wouldn't change the design.
I wouldn't change the camera location.
I wouldn't change the monitor location.
I wouldn't change the basic approach of powering the camera from the center marker/running-light circuit and using a regulator to provide stable 12V power.
And after 3,000 miles—including some pretty rough roads—I certainly wouldn't change the Furrion system based on its performance.
The project started because I was tired of an unreliable OEM camera. What I ended up with is considerably better than simply repairing it would have been: a dedicated observation camera that functions much more like the rearview mirror I wanted in the first place.
I'm not sure who might be paying attention to this, but I used to spend lots of time blogging about hiking equipment, camper maintenance, and anything else that I though was interesting. My last post was a book review on January 1, 2022. That means I have been absent for 4.5 years. What can I say? I was super busy running a company. So much has happened. In that time I now have 4 grandchildren (all boys!) and, sadly, my mom died (she is buried at hope mausoleum in New Orleans). This is not the same world it was for me in 2022.
Now I am about to turn the page on my career and get back to independent technical consulting. You can see my site here if you are interested in what I am going to be doing: https://tony.galluscio.com. I'm also picking up some of my interests back up like hiking, attempting to play the guitar, and trying to learn Spanish.
As a result, I thought this would also be a great time to pick my blog back up. I am going to start blogging about RV projects and hiking again!!